

Building a PC is an exciting journey that gives you control over each component of your system. But as with any project, mistakes can happen, especially if you’re new to the process. From compatibility issues to power requirements, a few missteps can easily disrupt your build or impact performance. Let’s explore some common PC building mistakes that you can avoid with a bit of preparation and attention to detail. With these tips in mind, you’ll be set up for a smoother build and a system that works just as you envisioned.
Understanding the Basics: Skipping Compatibility Checks
One of the most frequent mistakes new builders make is skipping compatibility checks. It’s easy to get excited about your components, but not all parts are compatible with each other. Taking the time to double-check compatibility will save you from having to swap out components mid-build.
Common Compatibility Issues to Watch Out For
- Motherboard and CPU: Each CPU is designed to work with a specific socket type,
 which needs to match your motherboard. For example, AMD and Intel use different sockets (e.g., AMD’s AM4 or Intel’s LGA1200). Always check that your CPU and motherboard have matching sockets, or they won’t connect.
 - RAM and Motherboard: Memory compatibility can be tricky because not all motherboards support the same type, speed, or capacity of RAM. Most motherboards specify the RAM they support in the product details. Look for memory that matches your motherboard’s specs, especially in terms of DDR generation (e.g., DDR4 or DDR5).
- GPU and Case Size: GPUs come in different sizes, and high-performance models can be long and bulky. Make sure your PC case has enough space to accommodate your GPU by checking both the case and GPU dimensions.
- Power Supply and Components: Not all power supplies (PSUs) have enough wattage to handle powerful GPUs and CPUs. Use an online calculator to estimate your system’s power needs and pick a PSU that provides at least 100-150W above your calculated requirement.
 which needs to match your motherboard. For example, AMD and Intel use different sockets (e.g., AMD’s AM4 or Intel’s LGA1200). Always check that your CPU and motherboard have matching sockets, or they won’t connect.
Compatibility checks may seem tedious, but they’re crucial to avoid frustrating issues later on. A few minutes of research can prevent headaches and extra expenses down the road.
Neglecting Proper Cooling and Airflow
Cooling is critical to your PC’s performance and longevity. One of the most common oversights is not setting up enough airflow to manage the heat generated by high-powered components, which can lead to overheating, decreased performance, or even damage to your system over time.
Key Tips for Cooling and Airflow
- Fan Placement Matters: Air should flow in one direction, ideally from front to back or bottom to top. Arrange your fans so that cool air enters from one side and exits on the other. Typically, intake fans are installed at the front or bottom, while exhaust fans go at the top or rear.
- Consider Aftermarket Coolers for the CPU: Most CPUs come with stock coolers, but these can struggle with intense workloads or overclocking. Upgrading to an aftermarket air or liquid cooler is an easy way to improve cooling, especially if you’re running demanding software or games.
- Leave Room for the GPU to Breathe: Graphics cards are significant heat sources, and crowding them with other components or poor airflow can cause them to run hot. Give your GPU adequate space, and if necessary, consider installing additional fans around it.
- Cable Management Helps Airflow: Poorly organized cables can obstruct airflow
 and trap heat. Tidy cables mean fewer obstructions for airflow, leading to a cooler system overall.
 and trap heat. Tidy cables mean fewer obstructions for airflow, leading to a cooler system overall.
Maintaining a balance between intake and exhaust fans will create a steady airflow pattern that keeps your system cool. Over time, this attention to airflow will prevent wear and tear, ensuring your components last longer and work efficiently.
Underestimating Power Supply Needs
The power supply unit (PSU) is one of the most crucial components in your PC, yet it’s often underestimated. Choosing an underpowered or low-quality PSU can lead to instability, random shutdowns, or even damage to your other components.
How to Choose the Right PSU
- Calculate Power Needs: The power needs of your system depend on your components. GPUs, CPUs, and cooling systems each draw specific amounts of power. Use an online PSU calculator to add up the wattage your build requires. A good rule of thumb is to add about 20% above your calculated total to ensure stability, especially during peak loads.
- Look for 80 Plus Certification: The 80 Plus certification indicates a PSU’s efficiency, meaning it wastes less energy and generates less heat. Higher ratings, like 80 Plus Bronze, Silver, Gold, or even Platinum, represent better efficiency and are worth considering for long-term performance.
- Avoid Low-Quality or No-Name PSUs: The power supply directly affects the safety and reliability of your entire system. Stick to trusted brands that offer warranties and safety features, even if they cost a bit more. A high-quality PSU will protect your components and deliver consistent power without surges or drops.
- Future-Proofing with a Higher Wattage: If you’re planning on upgrading your system later (like adding a more powerful GPU or extra storage), a PSU with a higher wattage can accommodate these changes without needing a replacement.
Choosing the right PSU is a long-term investment in your PC’s performance and stability. A reliable power supply ensures your build runs smoothly, even under heavy load, and gives you peace of mind that your components are safe.
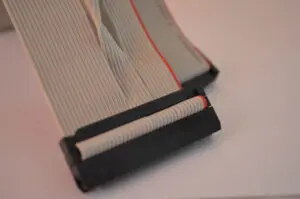
Improper Cable Management and Assembly
Building a PC can feel like solving a puzzle, and cable management is one of the more tedious aspects that builders often overlook. However, poorly managed cables can make your build look messy and hinder airflow, leading to higher temperatures and potential performance issues.
Tips for Effective Cable Management
- Plan Cable Routes Early: Before you start connecting everything, plan where each cable will go. Many PC cases come with built-in cable routing channels and ties that help keep things neat. Route the cables behind the motherboard whenever possible to keep them out of sight and away from airflow paths.
- Use Zip Ties or Velcro Straps: Zip ties and Velcro straps are your best friends when managing cables. These keep cables tightly bundled and prevent them from getting tangled or obstructing fans. If you need to reconfigure your build later, Velcro straps are particularly useful since they’re easy to adjust.
- Connect the PSU Last: To avoid a cable jungle, consider connecting your PSU cables last. This way, you can route and tidy them with the rest of your build in place, allowing you to see where any extra lengths or unnecessary cables can be hidden.
- Avoid Tension on Cables: Avoid bending or stretching cables too tightly, as this can cause damage or disconnections. Give cables enough slack to move without putting pressure on the connectors.
- Check Connections Carefully: Loose connections are a common issue in PC building, especially with smaller, delicate connectors like those for power and reset buttons. Double-check that everything is securely connected, including power cables to the CPU, motherboard, and GPU.
Good cable management not only looks clean but also improves airflow, which helps with cooling. It also makes future upgrades or troubleshooting easier, as you’ll be able to access and identify components more quickly.
Wrapping Up: Avoiding Common Pitfalls in Your PC Build
Building a PC is a rewarding experience, but it comes with a learning curve. Avoiding these common mistakes will save you time, money, and frustration, ensuring your PC runs smoothly and efficiently. Taking the time to double-check compatibility, plan for cooling and airflow, choose a reliable power supply, and manage your cables can make all the difference between a reliable build and one plagued by issues.
Every step you take towards a cleaner, more organized, and well-powered build will not only improve your system’s performance but also make it easier to upgrade and maintain in the future. Happy building, and here’s to creating a PC that meets all your needs!