

A Step-by-Step Guide To Building A Hackintosh
Building a Hackintosh can be an exciting project for PC enthusiasts who want the look and feel of macOS without buying a Mac. A Hackintosh is simply a non-Apple computer that runs macOS. While the process can seem intimidating at first, breaking it down into smaller steps makes it much easier for beginners to follow.
Before starting, keep in mind that building a Hackintosh takes patience. Compatibility is extremely important, and not every PC component works well with macOS. Taking your time during setup will help avoid many common issues later.
What You Need Before You Begin
Before building your Hackintosh, gather the following:
- A compatible PC or PC components
- A USB flash drive with at least 16GB of storage
- Access to a Mac or an existing Hackintosh
- A stable internet connection
- A copy of macOS
- Basic computer knowledge and troubleshooting skills
It is also helpful to have a second computer nearby in case you need to look up guides or download files during installation.
Step 1: Choose Compatible Hardware
The most important part of building a Hackintosh is choosing hardware that works well with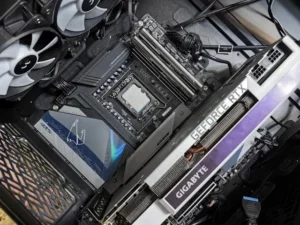 macOS.
Generally, Intel-based systems tend to have better compatibility than AMD systems for beginners. Components that commonly work well include:
- Intel Core processors
- Compatible motherboards with Intel chipsets
- AMD Radeon graphics cards
- SSD storage drives
- Wi-Fi cards supported by macOS
When selecting parts, research compatibility carefully. Many beginners run into problems because they purchase hardware without checking whether macOS supports it.
Recommended Areas To Research
- Motherboard compatibility
- Graphics card support
- Audio support
- Wi-Fi and Bluetooth compatibility
- USB controller compatibility
Choosing well-supported hardware can save hours of troubleshooting later.
Step 2: Download macOS
Next, download the version of macOS you plan to install.
You can download macOS from the App Store on a Mac. The installer file is required to create the bootable installation USB.
Make sure the macOS version you choose works with your hardware. Some older components may not support newer versions of macOS.
Step 3: Create A Bootable USB Installer
Once macOS is downloaded, you will need to create a bootable USB installer.
This USB drive will contain:
- The macOS installer
- A bootloader
- Essential configuration files
The most commonly used bootloader today is OpenCore. OpenCore helps your PC boot macOS properly by handling hardware communication during startup.
Basic USB Preparation Steps
- Insert the USB drive into your Mac
- Open Disk Utility
- Erase the USB drive using:
- GUID Partition Map
- Mac OS Extended (Journaled)
- Create the macOS installer on the USB drive
- Add the OpenCore bootloader files
This part can feel complicated for beginners, but following setup guides carefully usually makes the process manageable.
Step 4: Configure OpenCore
After preparing the USB installer, you will need to configure OpenCore.
OpenCore uses a configuration file that tells macOS how to interact with your hardware. This is one of the most important parts of the Hackintosh setup process.
Common Configuration Tasks
- Setting CPU information
- Enabling graphics support
- Configuring USB ports
- Setting boot arguments
- Adding required drivers and kernel extensions
Kernel extensions, often called “kexts,” act like drivers in Windows. They help macOS recognize your hardware.
Commonly Used Kexts
- VirtualSMC
- Lilu
- WhateverGreen
- AppleALC
Beginners should avoid changing settings they do not understand. Even small mistakes in configuration files can prevent the system from booting.
Step 5: Adjust BIOS Settings
Before installing macOS, enter your motherboard’s BIOS or UEFI settings.
Different motherboards use different layouts, but the overall process is similar.
Common BIOS Changes
- Disable Secure Boot
- Disable Fast Boot
- Enable AHCI mode
- Enable UEFI boot mode
- Disable VT-d if needed
- Enable XHCI Hand-off
Save your changes before exiting the BIOS.
Incorrect BIOS settings are one of the most common causes of installation problems.
Step 6: Boot From The USB Installer
Insert the USB installer into your Hackintosh system and restart the computer.
Open the boot menu and select the USB drive.
If everything was configured correctly, you should see the OpenCore boot menu. From there, choose the macOS installer.
The system may restart several times during installation. This is normal.
Step 7: Install macOS
Once the installer loads, you can begin installing macOS.
Installation Steps
- Open Disk Utility
- Select your target SSD or hard drive
- Erase the drive using:
- APFS format
- GUID Partition Map
- Exit Disk Utility
- Start the macOS installation
The installation process can take some time depending on your hardware.
During setup, the computer may reboot multiple times. Continue selecting the macOS installer or installation drive from the boot menu when needed.
Step 8: Complete Initial macOS Setup
After installation finishes, macOS will guide you through the first-time setup process.
You will:
- Create a user account
- Configure system preferences
- Connect to Wi-Fi
- Set privacy options
Once complete, you should arrive at the macOS desktop.
At this point, your Hackintosh is functional, but there may still be some additional setup required.
Step 9: Install OpenCore To Your Main Drive
Right now, your system probably still relies on the USB drive to boot.
To make the Hackintosh boot independently:
- Mount the EFI partition on your SSD
- Copy the OpenCore EFI folder from the USB drive
- Paste it onto the SSD’s EFI partition
After doing this, restart the computer without the USB drive connected.
If everything works correctly, macOS should boot normally from the internal drive.
Step 10: Test Your Hardware
After installation, test all major hardware components.
Check The Following
- Audio
- Graphics acceleration
- USB ports
- Wi-Fi
- Bluetooth
- Sleep mode
- Ethernet
- App Store access
Some features may require additional configuration or updated kexts.
It is normal for Hackintosh systems to need a little fine-tuning after installation.
Common Beginner Mistakes
Many first-time Hackintosh builders run into similar problems.
Using Unsupported Hardware
Compatibility problems are the number one issue for beginners.
Skipping BIOS Configuration
Incorrect BIOS settings can prevent macOS from booting properly.
Editing Configuration Files Incorrectly
Even a small mistake in OpenCore settings can create boot errors.
Forgetting Backups
Always keep backup copies of:
- Your EFI folder
- Configuration files
- Important data
Backups can save a huge amount of frustration during troubleshooting.
Is Building A Hackintosh Worth It?
For many PC enthusiasts, building a Hackintosh is a rewarding learning experience. It allows users to explore macOS while using custom PC hardware.
However, Hackintosh systems can require ongoing maintenance, especially after macOS updates. Beginners should expect occasional troubleshooting and compatibility adjustments over time.
If you enjoy learning about hardware, operating systems, and computer configuration, building a Hackintosh can be a fun and educational project.
Conclusion
Building a Hackintosh may seem overwhelming at first, but taking the process one step at a time makes it much more approachable for beginners. Choosing compatible hardware, carefully configuring OpenCore, and following installation steps closely are the keys to success.
Patience is important throughout the process. Problems can happen, but most issues have solutions if you troubleshoot carefully. By learning how the installation works and understanding your hardware, you can create a functional macOS system on custom PC hardware while gaining valuable technical experience along the way.