

Best Practices for Disk Cleanup
Introduction
If your computer feels sluggish, takes longer than usual to start up, or constantly warns you about low disk space, it might be time for some digital housekeeping.
Disk cleanup is one of the easiest ways to reclaim valuable storage space and prevent unnecessary files from piling up. When your computer’s drive is nearly full, freeing up space may also help Windows run more smoothly.
In this beginner-friendly guide, we’ll cover simple, safe, and effective ways to clean up your PC without accidentally deleting important files. Whether you use your computer for gaming, work, or everyday browsing, these tips will help you manage your storage and keep your system organized.
1. Why Disk Cleanup Matters
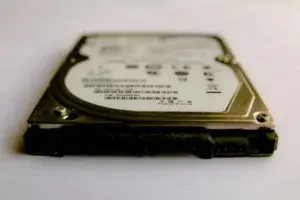
Over time, your computer accumulates unnecessary files, including temporary system files, cached data, leftover update files, and downloads you may have forgotten about.
These files might not seem like a big deal individually, but they can gradually consume valuable storage space.
When your main drive becomes nearly full, Windows may have difficulty finding enough room for temporary files, updates, and other system operations. This can sometimes lead to slower performance, failed updates, or problems saving new files.
Regular disk cleanup helps you reclaim storage space and reduces the chances of running into these issues.
For most beginners, checking available storage about once a month is a reasonable habit. If you regularly download large files, install games, or work with videos, you may want to check more frequently.
Technician’s Tip: If you already have plenty of free storage space, deleting temporary files probably won’t make a noticeable difference in your computer’s speed. Disk cleanup is primarily about managing storage and preventing problems caused by a nearly full drive.
2. Identifying Unnecessary Files
Before deleting anything from your computer, it’s important to understand what you’re removing. Not every large file is unnecessary, and deleting the wrong files could cause you to lose important documents or other information.
Here are some common types of files that may be taking up valuable storage space:
- Temporary files: Files created by Windows and applications during normal operation. Many can be removed safely using Windows’ built-in cleanup tools.
- Recycle Bin contents: Files you’ve deleted but haven’t permanently removed from your computer.
- Old downloads: Installation files, documents, pictures, and other downloads you no longer need.
- Browser cache: Temporary website data stored by your browser. Clearing it can free some space, although websites may load more slowly the first time you revisit them.
- Windows Update cleanup files: Files left behind after Windows updates that may no longer be needed.
Check What’s Using Your Storage Space
Windows 10 and Windows 11 include built-in tools that help you identify which types of files are using your storage.
- Open the Start menu.
- Select Settings.
- Click System.
- Select Storage.
- Wait while Windows analyzes your drive’s storage usage.
- Review the categories to see what’s taking up space.
You should see: A breakdown of storage usage, including categories such as installed apps, temporary files, and documents.
Select a category to explore it further. The available options may differ slightly between Windows 10 and Windows 11.
Important: Don’t delete files simply because they’re large or unfamiliar. If you’re unsure what a file does, leave it alone until you can identify it.
Technician’s Tip: Pay particular attention to your Downloads folder. It often contains installation files and other downloads you no longer need, but it may also contain important documents. Review the contents carefully before deleting anything.
3. Using Disk Cleanup Tools Effectively
Windows 10 and Windows 11 include built-in tools that can help you remove unnecessary files and reclaim storage space without installing additional software.
Two useful options are Disk Cleanup and Storage Sense.
Using Disk Cleanup on Windows
Disk Cleanup is a built-in Windows utility that identifies certain temporary and unnecessary files that may be safe to remove.
Tools needed: Disk Cleanup
Estimated time: 5–15 minutes, depending on how many files need to be removed.
Follow these steps:
- Open the Start menu.
- Type Disk Cleanup into the search box.
- Select Disk Cleanup from the search results.
- Choose your main drive, usually C:, if Windows asks you to select one.
- Wait while Windows calculates how much space you may be able to recover.
- Review the available file categories and select the ones you want to remove.
- Click OK.
- Select Delete Files to confirm.
You should see: Windows remove the selected files and close the Disk Cleanup window when the process finishes.
Important: Read the descriptions of the file categories before selecting them. Some categories may contain files you want to keep, such as items in the Recycle Bin.
For additional cleanup options, you can select Clean up system files. This may reveal categories such as Windows Update Cleanup.
Be aware that removing certain system cleanup files can limit your ability to uninstall previous updates or return to an earlier Windows version.
Using Storage Sense in Windows 10 and 11
Storage Sense is another built-in Windows feature that can automatically remove certain unnecessary files.
To enable it:
- Open Settings.
- Select System.
- Click Storage.
- Find Storage Sense and open its settings.
- Turn on Storage Sense if it isn’t already enabled.
- Review the available cleanup options and choose how often you want Storage Sense to run.
For additional ways to reclaim storage, see my How to Free Up Disk Space guide.
You should see: Options for automatically cleaning temporary files and managing items in the Recycle Bin.
Depending on your Windows version, you may also see options for cleaning files in your Downloads folder.
Important: Don’t enable automatic Downloads cleanup unless you’re comfortable with Windows removing files from that folder according to the schedule you select.
Technician’s Tip: Storage Sense is a convenient choice for beginners because it can handle routine cleanup automatically. However, you should still check your available storage occasionally.
Should You Use Third-Party Disk Cleanup Tools?
Programs such as CCleaner, BleachBit, and Glary Utilities offer additional cleanup features.
However, most beginners don’t need third-party software for routine disk cleanup. Windows’ built-in tools are usually sufficient for removing temporary files and managing storage.
If you decide to use a third-party utility, download it from the developer’s official website and carefully review what it plans to delete.
Important: Avoid registry cleaning as part of routine disk maintenance. Removing registry entries generally won’t improve performance and can sometimes cause software problems.
4. Maintaining a Clean and Efficient System
Cleaning up your computer once can help reclaim storage space, but developing a few simple maintenance habits can prevent unnecessary files from accumulating again.

You don’t need to spend hours maintaining your computer. A few regular checks can make managing your storage much easier.
Here are some practical habits to follow:
- Enable automatic cleanup. Use Windows Storage Sense to remove certain temporary files automatically. Review its settings so you understand which files Windows may delete.
- Uninstall programs you no longer use. Open Settings → Apps and review your installed programs. Remove applications you recognize and no longer need. Avoid uninstalling unfamiliar software until you know what it does.
- Review your Downloads folder. Check for old installers, duplicate downloads, and other files you no longer need. Keep important documents and files you may need later.
- Organize your personal files. Create folders for documents, pictures, and other important information. Organizing files won’t directly free up storage space, but it makes identifying unnecessary files easier.
- Empty the Recycle Bin when appropriate. Files in the Recycle Bin continue using storage space until they’re permanently removed. Check its contents before emptying it.
- Let Windows optimize your drives. Windows includes a built-in Optimize Drives feature that handles appropriate maintenance for hard drives and SSDs. For most beginners, leaving automatic optimization enabled is sufficient. SSDs should not be manually defragmented using traditional HDD defragmentation methods.
- Back up important files. Before performing a major cleanup, make sure important documents, photos, and other personal files are backed up. This helps protect against accidental deletion.
Technician’s Tip: Check your available storage about once a month. If you notice that your drive is filling up quickly, investigate what’s using the space rather than repeatedly deleting temporary files.
Regular maintenance can help prevent low-storage warnings and make it easier to keep your computer organized.
Conclusion
Disk cleanup is a simple but important part of keeping your computer organized and running smoothly.
By removing unnecessary files, reviewing your storage usage, and using built-in Windows tools like Disk Cleanup and Storage Sense, you can reclaim valuable space and help prevent problems caused by a nearly full drive.
Remember, you don’t need expensive software or complicated tools to maintain your computer. Windows already includes everything most beginners need for routine disk cleanup.
For additional ways to keep your PC in good condition, check out my How to Clean and Maintain Your Computer guide.
Taking a few minutes each month to check your storage can help you avoid unexpected low-disk-space warnings.
💬 What about you? How often do you clean up your computer’s storage? Do you prefer using Disk Cleanup or Storage Sense? Share your experience in the comments below!