
How To Clean Dust From Your PC: Step-by-Step for Beginners
Dust is one of the most common causes of overheating and poor computer performance. Over time, dust builds up inside your PC and blocks airflow, causing components to run hotter than they should. In severe cases, excessive dust can even shorten the lifespan of your hardware.
The good news is that cleaning dust from your PC is easier than many beginners expect. With a few simple tools and careful handling, you can safely improve airflow, cooling performance, and overall system health.
In this beginner-friendly guide, you’ll learn how to clean dust from your PC step by step and how to keep your computer cleaner in the future.
Why Dust Is Bad for Your PC
Your computer relies on airflow to cool important components like:
- The CPU
- Graphics card (GPU)
- Power supply
- RAM
- Storage drives
Dust buildup can:
- Block fans
- Trap heat
- Reduce airflow
- Cause loud fan noise
- Increase temperatures
- Lead to thermal throttling
- Cause random shutdowns
Regular cleaning helps your PC run cooler and more efficiently.
Signs Your PC May Need Cleaning
You may need to clean dust from your computer if you notice:
- Fans running loudly all the time
- Higher temperatures during gaming or work
- Reduced performance
- Random overheating shutdowns
- Visible dust around vents
- Weak airflow from fans
Desktop PCs usually collect more visible dust, but laptops can become clogged internally as well.
Tools You’ll Need
Before starting, gather a few basic cleaning supplies.
Recommended tools include:
- Compressed air
- A soft microfiber cloth
- A soft anti-static brush
- Small screwdriver set
- Flashlight
- Cable ties if organizing cables
Optional but helpful:
- Anti-static wrist strap
- Electric air duster
- Dust filter replacements
Avoid using household vacuums directly inside the PC because they can create static electricity.
Step 1: Shut Down and Unplug Your PC
Before opening your computer:
- Fully shut down Windows
- Turn off the power supply if available
- Unplug the power cable
- Disconnect peripherals like:
- Monitors
- USB devices
- Ethernet cables
Safety should always come first when working inside a PC.
If you recently used the computer, allow it to cool for several minutes before cleaning.
Step 2: Move Your PC to a Well-Ventilated Area
Cleaning dust indoors can quickly make a mess.
Whenever possible:
- Move the PC outside
- Work in a garage
- Use a well-ventilated room
Compressed air can blow large amounts of dust into the air very quickly.
Good lighting also helps you spot hidden dust buildup.
Step 3: Open the PC Case Carefully
Most desktop side panels are secured with:
- Thumb screws
- Phillips screws
- Sliding release mechanisms
Carefully remove the side panel and place it somewhere safe.
Avoid forcing panels open if they feel stuck.
If you have a laptop, consult your manufacturer’s guide before opening it because some systems are more delicate.
Step 4: Hold Fans in Place Before Using Compressed Air
Before spraying compressed air:
- Prevent fans from spinning freely
- Hold fan blades gently with a finger or soft object
Spinning fans too fast from compressed air can potentially damage fan bearings or generate unwanted electrical current.
This is one of the most overlooked beginner mistakes.
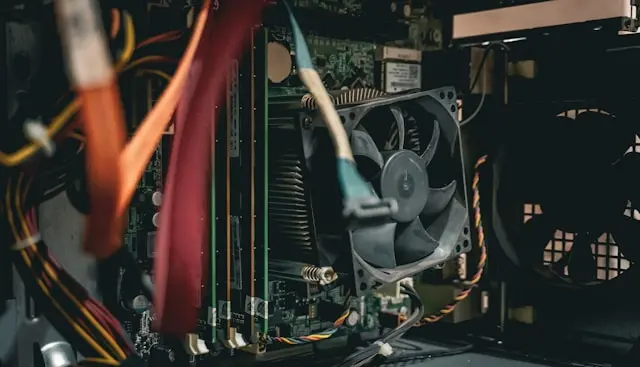
Step 5: Blow Dust Out of the Fans and Heatsinks
Use short bursts of compressed air to clean: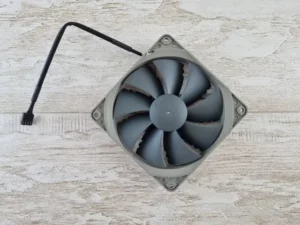
- CPU cooler
- GPU fans
- Case fans
- Power supply vents
- Dust filters
- Heatsinks
Focus on removing dust trapped between heatsink fins because that area heavily affects cooling performance.
Avoid holding the compressed air can upside down, as liquid propellant may spray out.
Step 6: Clean Dust Filters
Many modern PC cases include removable dust filters.
Common filter locations include:
- Front intake vents
- Bottom power supply vents
- Top ventilation panels
Remove filters carefully and:
- Wipe them with a microfiber cloth
- Use compressed air
- Rinse washable filters if allowed by the manufacturer
Make sure filters are fully dry before reinstalling them.
Dust filters greatly reduce future dust buildup.
Step 7: Wipe Interior Surfaces Carefully
After blowing out dust:
- Use a microfiber cloth to wipe surfaces
- Gently clean flat interior areas
- Remove remaining dust buildup
Avoid excessive pressure near delicate components.
Never use wet cleaning products directly inside your computer.
Step 8: Organize Cables for Better Airflow
Messy cables can restrict airflow and trap dust.
If needed:
- Bundle loose cables together
- Route cables behind the motherboard tray
- Use cable ties or Velcro straps
Better cable management improves:
- Air circulation
- Cooling efficiency
- Overall appearance
Step 9: Reassemble Your PC
Once cleaning is complete:
- Reinstall dust filters
- Secure side panels
- Reconnect cables
- Plug the PC back in
- Power the system on
Listen for unusual sounds and verify all fans are spinning normally.
If something seems wrong, power off the PC and double-check connections.
Step 10: Monitor Temperatures After Cleaning
After removing dust, many users notice:
- Lower temperatures
- Quieter fans
- Better gaming performance
- Improved system responsiveness
You can monitor temperatures using trusted software tools.
Normal temperature improvements after cleaning can range from a few degrees to much larger reductions in heavily dusted systems.
How Often Should You Clean Your PC?
Cleaning frequency depends on your environment.
Clean More Frequently If You Have:
- Pets
- Carpeted floors
- Smokers in the home
- High dust environments
- Multiple intake fans
General Cleaning Recommendations
- Light cleaning: every 2–3 months
- Deep cleaning: every 6–12 months
Checking filters monthly can help prevent heavy buildup.
Common PC Cleaning Mistakes Beginners Should Avoid
Using a Household Vacuum Inside the PC
Vacuums can generate static electricity that may damage sensitive components.
Compressed air is much safer.
Spraying Compressed Air Too Close
Holding the nozzle too close can damage fan blades or force debris deeper into components.
Use controlled bursts from a short distance away.
Forgetting To Hold Fans Still
Free-spinning fans can become damaged during cleaning.
Always stabilize them first.
Cleaning While the PC Is Plugged In
Never clean internal components while power is connected.
Always unplug the system completely first.
Tips To Reduce Dust Buildup in the Future
You can reduce future dust accumulation by:
- Keeping the PC off the floor
- Cleaning your room regularly
- Using dust filters
- Maintaining positive airflow
- Keeping pets away from intake vents
A cleaner environment helps your computer stay cleaner longer.
Final Thoughts
Learning how to clean dust from your PC is one of the simplest and most effective forms of computer maintenance. Regular cleaning helps improve airflow, reduce temperatures, lower fan noise, and extend the lifespan of your hardware.
The process may seem intimidating at first, but with patience and careful handling, most beginners can safely clean their computers at home.
Remember to:
- Power off and unplug the PC
- Use compressed air carefully
- Hold fans in place
- Clean dust filters regularly
- Monitor temperatures afterward
A clean PC not only performs better but also stays healthier over the long term.
Continue learning here:
PC Maintenance for Beginners