
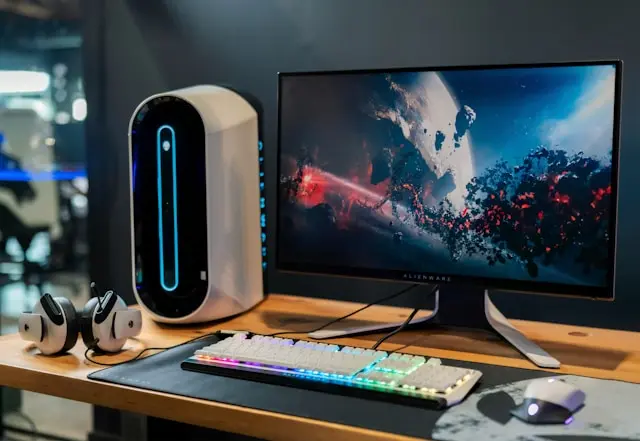
How to Optimize Your Gaming Monitor Settings for the Best Experience
Introduction
When it comes to gaming, most people focus on their graphics card, processor, or how much RAM they have installed. While those components are important, your gaming monitor plays a huge role in how games actually look and feel. Even a powerful gaming PC can fall short if your monitor settings aren’t properly optimized.
The good news? You don’t need to be a tech expert to improve your gaming monitor setup. With a few simple adjustments, you can get smoother gameplay, better colors, clearer images, and reduced eye strain—all without spending extra money.
In this guide, we’ll walk through the most important gaming monitor settings, explain what they do in plain English, and show you how to optimize them step by step. Whether you’re gaming casually or competitively, these tips will help you get the most out of your screen.
Understanding Key Monitor Settings
Before making adjustments, it helps to understand what the most common monitor settings actually do. Most monitors have an on-screen display (OSD) menu that you can access using buttons or a joystick on the back or side of the screen.
Resolution
Resolution determines how sharp your image looks. For most gamers:
- 1080p (1920×1080) is great for budget and competitive gaming
- 1440p (2560×1440) offers sharper visuals without being too demanding
- 4K (3840×2160) looks stunning but requires a powerful GPU
Always set your monitor to its native resolution for the best clarity.
Refresh Rate
Refresh rate is measured in Hertz (Hz) and tells you how many times per second the screen refreshes.
- 60Hz is standard
- 120Hz, 144Hz, or higher provides smoother motion
Make sure your refresh rate is set correctly in both your monitor settings and your operating system. Many users forget this step and unknowingly stay at 60Hz.
Response Time
Response time affects motion blur and ghosting. Lower is better.
- Look for settings labeled “Overdrive” or “Response Time”
- Medium or Fast is usually ideal
- Avoid Extreme settings, which can cause visual artifacts
Brightness and Contrast
Brightness controls how light or dark the screen appears, while contrast affects the difference between light and dark areas. Too much brightness can strain your eyes, especially during long gaming sessions.
A good rule of thumb is to adjust brightness so white areas aren’t blinding, but dark areas still show detail.
Calibrating Color and Image Quality
Color accuracy and image clarity can make games more immersive and easier on your eyes.
Adjusting Color Temperature
Most monitors let you choose between color modes like:
- Cool
- Warm
- Normal
- Custom (RGB)
For gaming, Warm or Normal usually provides the most natural colors. If your monitor allows custom RGB adjustments, you can fine-tune red, green, and blue levels for better balance.
Sharpness Settings
Sharpness enhances edges, but too much can make images look unnatural.
- Start around the default setting
- Increase slightly if the image looks soft
- Avoid high levels that cause halos around objects
Using Preset Modes
Many gaming monitors include preset modes like FPS, RTS, Racing, or Movie.
- FPS modes often boost brightness and visibility
- Movie modes may enhance contrast and color saturation
Feel free to experiment, but don’t assume presets are perfect out of the box. Small tweaks can make a big difference.
Software Calibration
Windows and macOS both offer built-in calibration tools that guide you through brightness, contrast, and color adjustments. These tools are beginner-friendly and can significantly improve image quality.
Configuring Advanced Gaming Features
Modern gaming monitors include advanced features designed to improve performance and reduce visual issues.
Adaptive Sync (G-SYNC / FreeSync)
Screen tearing happens when your monitor and GPU aren’t synced. Adaptive sync technologies fix this.
- Enable G-SYNC (NVIDIA) or FreeSync (AMD)
- Make sure it’s enabled in both the monitor and GPU software
This feature alone can dramatically improve smoothness.
Black Equalizer or Shadow Boost
These settings brighten dark areas without washing out the rest of the image.
- Useful in FPS games where enemies hide in shadows
- Increase gradually to avoid a “gray” look
Low Input Lag Mode
Many monitors have a low-latency or gaming mode.
- Reduces delay between input and on-screen action
- Ideal for competitive gaming
HDR (High Dynamic Range)
HDR can improve brightness and contrast, but results vary.
- Enable HDR only if your monitor supports it well
- Poor HDR implementations may look worse than SDR
If HDR looks washed out, it’s okay to leave it disabled.
Tips for Ongoing Monitor Optimization
Optimizing your monitor isn’t a one-time task. A few ongoing habits can help maintain performance and comfort.
Match Game Settings to Your Monitor
If your game runs at 60 FPS but your monitor is 144Hz, you won’t see the full benefit. Adjust in-game settings to balance performance and visuals.
Reduce Eye Strain
- Use blue light filters at night
- Lower brightness in dark rooms
- Follow the 20-20-20 rule: every 20 minutes, look 20 feet away for 20 seconds
Keep Firmware and Drivers Updated
Some monitors receive firmware updates that improve performance or fix bugs. GPU driver updates can also affect display behavior.
Revisit Settings After Changes
If you upgrade your GPU, change your desk lighting, or switch games, revisit your monitor settings. Small adjustments can make a big difference depending on your setup.
Conclusion
Optimizing your gaming monitor settings is one of the easiest and most affordable ways to improve your gaming experience. With the right resolution, refresh rate, color calibration, and gaming features enabled, your games can look smoother, clearer, and more immersive—without upgrading your hardware.
Take your time, experiment with settings, and don’t be afraid to reset to defaults and start fresh if things look off. Every setup is a little different, and the best settings are the ones that feel right to you.
Have you adjusted your gaming monitor settings before, or are you planning to try it now? Leave a comment below and share your favorite tweaks or any questions you still have. Your experience might help someone else get better results too!