
How to Build Your Computer from Scratch: A Beginner’s Guide
Introduction
Building your own computer can feel intimidating at first, but once you get started, you’ll realize it’s like assembling a very advanced LEGO set. Instead of paying extra for a prebuilt system, you get to choose every component, customize it to your needs, and learn a ton in the process.
The best part? Building a PC isn’t just for tech pros. With some patience, a bit of planning, and careful attention to detail, anyone can do it. In this guide, we’ll cover the essential steps of building a computer from scratch: asking the right questions before you buy parts, putting everything together, troubleshooting common issues, and finally setting up your hard drive and Windows.
By the end, you’ll have the knowledge and confidence to create a computer that’s truly your own.
Important Questions You Need to Ask Yourself Before Building a Computer
Before you even touch a screwdriver, you need to think about what kind of computer you actually want. The parts you buy depend heavily on how you’ll use the system.
Questions to ask yourself:
- 🖥️ What’s my budget? A gaming PC can get expensive quickly, while a basic work PC might only need a few essential components.
- 🎮 What will I use it for? Gaming, video editing, office work, or general use all have different hardware needs.
- 🛠️ Do I want to upgrade later? Choosing a motherboard with extra slots or a larger case can make future upgrades easier.
- 🔊 Do I care about noise levels? Some fans are quieter than others, and cases with sound-dampening can help.
- 🌡️ Where will I keep the computer? If space is limited, a compact case might be the way to go.
Once you answer these questions, you can start selecting compatible parts:
- CPU & motherboard (make sure the socket types match)
- RAM (speed and capacity)
- Graphics card (if needed for gaming or design work)
- Storage (SSD for speed, HDD for capacity)
- Power supply (reliable, with enough wattage for your components)
- Case (make sure everything fits)
Doing research up front saves you time, money, and frustration down the road.
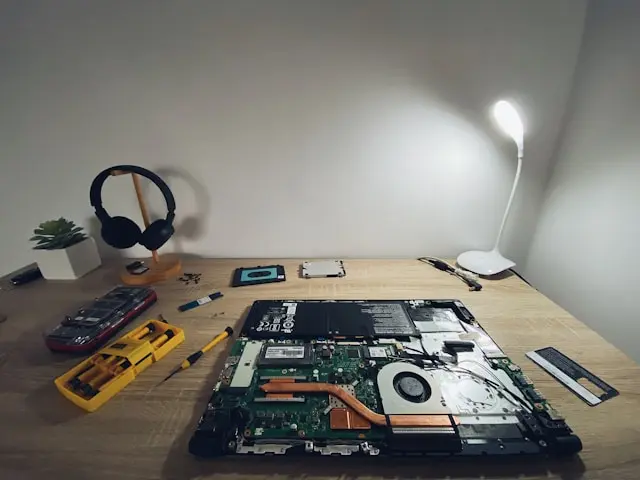
Assembling the Computer
Now comes the fun part: putting it all together. Don’t worry—if you take your time and follow a logical order, it’s easier than you might think.
Step 1: Prepare your workspace
- Work on a flat, non-carpeted surface.

- Use good lighting.
- Wear an anti-static wrist strap if you have one.

Step 2: Install the CPU and RAM
- Open the CPU socket on the motherboard and carefully place the processor in.
- Add thermal paste (if not pre-applied on the cooler).
- Install your CPU cooler.
- Insert RAM sticks into the memory slots until they click into place.
Step 3: Mount the motherboard
- Secure the motherboard inside the case with screws and standoffs.
Step 4: Add storage and GPU
- Install your SSDs or HDDs into their designated slots.
- Insert your graphics card into the PCIe slot until it locks in.
Step 5: Connect the power supply
- Attach the main 24-pin connector to the motherboard.
- Connect the 8-pin CPU power cable.
- Plug in the power cables for GPU, storage drives, and fans.
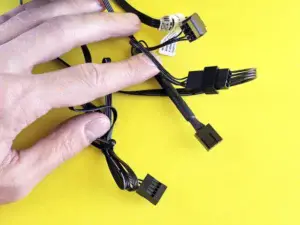
Step 6: Cable management
- Use zip ties to keep cables neat. This improves airflow and makes future upgrades
 easier.
 easier.
At this stage, you’ve built the physical system. The next step is powering it on and making sure everything works.
Troubleshoot Your Hardware
It’s rare to have a completely flawless first boot. If your PC doesn’t power on or you get no display, don’t panic. Troubleshooting is part of the process.
Common issues and fixes:
- 💡 No power at all: Check that the PSU switch is on and that all power cables are firmly connected.
- 💡 Fans spin but no display: Reseat the RAM or graphics card. Double-check your monitor cable.
- 💡 Beeping sounds: Your motherboard is giving error codes. Look up the beep code meanings in your manual.
- 💡 Overheating or shutdowns: Make sure CPU cooler and fans are installed correctly. Check airflow.
- 💡 Random restarts: Could be a loose cable or an underpowered PSU.
Tip: Test your build outside the case first (“breadboarding”) to confirm everything works before installing it into the case. This makes troubleshooting easier.
Troubleshooting can feel frustrating, but most problems boil down to loose connections or minor mistakes. With patience, you’ll get it running.
Partitioning Your Hard Drive and Installing Windows
Once your hardware is good to go, it’s time to set up your software. This step is all about preparing your storage and installing Windows.
Partitioning your drive:
- When you install Windows, it will ask how you want to use your hard drive.
- A “partition” splits your drive into separate sections—like dividing a bookshelf into different compartments.
- For most users, one partition is fine, but you can create multiple if you want to keep files and programs separate.
Installing Windows:
- Create a Windows installation USB using Microsoft’s Media Creation Tool.
- Plug the USB into your new PC and boot from it.
- Follow the prompts to install Windows onto your main drive (usually your SSD).
- Enter your product key if you have one, or skip for now and activate later.
- Once installed, Windows will guide you through setup, including Wi-Fi, accounts, and updates.
After that, install your drivers (motherboard, graphics card, etc.), followed by your favorite programs. At this point, your PC is officially ready for action!
Conclusion
Building your own computer might seem like a big project, but it’s an incredibly rewarding one. By asking the right questions before buying parts, carefully assembling your components, troubleshooting any hiccups, and setting up Windows, you’ll end up with a machine that’s perfectly suited to your needs.
Not only will you save money compared to buying a prebuilt system, but you’ll also gain valuable knowledge and confidence in how your computer works. That makes future upgrades and repairs much easier.
👉 Have you ever built your own PC, or are you thinking about giving it a try? Share your thoughts or questions in the comments below—I’d love to hear your experience!