
Essential Tools You Need for Building Your Own PC
Introduction
Building your own PC can feel a little intimidating at first. Between all the components, cables, and tiny screws, it’s easy to worry that you’ll miss something important or mess something up. The good news? You don’t need a garage full of tools or professional experience to build a computer successfully. With the right set of basic tools—and a little patience—you can confidently put together your own PC at home.
In this guide, we’ll walk through the essential tools you need for building your own PC, explain what each tool is used for, and highlight common mistakes beginners make along the way. Whether you’re building your first computer or upgrading an older system, having these tools on hand will make the entire process smoother, safer, and far less stressful.
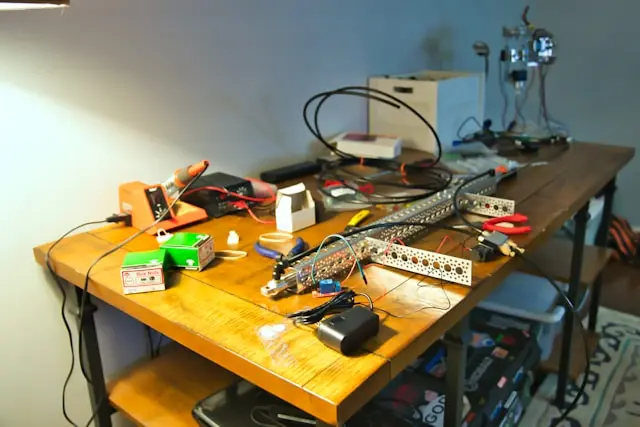
Basic Tools for Assembling a PC
When it comes to physically putting your PC together, you’ll be surprised by how simple the tool list really is. Most PC builds can be completed with just a few basic items.
Phillips Head Screwdriver (Magnetic Preferred)
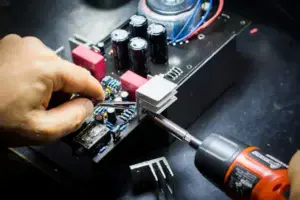
This is the most important tool you’ll need. Nearly every screw inside a PC case uses a Phillips head design. A magnetic tip is highly recommended because it helps prevent screws from falling into hard-to-reach areas of your case (which happens more often than you’d think).
A medium-sized screwdriver usually works best, but having a smaller one on hand can help with M.2 SSD screws or tight spaces.
Anti-Static Wrist Strap (Optional but Helpful)
Static electricity is one of the biggest fears for new PC builders. While modern components are more durable than they used to be, static discharge can still cause damage.
An anti-static wrist strap grounds you while you work, reducing the risk of accidentally shocking your components. If you don’t have one, you can still stay safe by working on a non-carpeted surface and touching a metal part of your case regularly.
Small Containers or Magnetic Tray
PC cases use a lot of tiny screws, and losing even one can be frustrating. Using a small container, cup, or magnetic parts tray keeps everything organized while you work.
This simple tool can save you time, stress, and the inevitable moment of crawling around on the floor looking for a missing screw.
Flashlight or Headlamp
PC cases can get dark, especially when routing cables or installing parts near the power supply shroud. A small flashlight—or even your phone’s flashlight—can make a huge difference when checking connections or reading motherboard labels.
Tools for Testing and Troubleshooting
Once your PC is assembled, the next step is making sure everything works as expected.
These tools help you test, diagnose, and fix common issues that may pop up during or after your build.
Power Supply Tester (Optional)
A power supply tester allows you to verify that your PSU is delivering power correctly before or after installation. While not required, it can be useful if your PC doesn’t power on and you’re trying to isolate the problem.
For beginners, this tool is more of a “nice to have” than a must-have.
USB Flash Drive
A USB flash drive is essential for installing your operating system, updating the BIOS, or loading drivers. Many modern PCs don’t include optical drives, so a USB drive becomes your main installation tool.
Make sure your flash drive is at least 8GB and formatted properly before starting.
Spare HDMI or DisplayPort Cable
Display issues are common during first boot, and sometimes the problem is as simple as a faulty cable. Having a spare display cable on hand helps rule out this easy-to-fix issue quickly.
Notebook or Notes App
This might sound basic, but writing things down helps. Whether it’s error codes, beep patterns, or steps you’ve already tried, keeping notes can save time when troubleshooting—or when asking for help online.
Cleaning and Maintenance Tools
Keeping your PC clean during and after the build is just as important as assembling it correctly. Dust, fingerprints, and improper airflow can impact performance over time.
Compressed Air
Compressed air is your best friend for removing dust from fans, heatsinks, and tight spaces. It’s especially useful before installing components into a case that may have been sitting in storage.
Always use short bursts and keep the can upright to avoid spraying moisture.
Microfiber Cloth
A microfiber cloth is perfect for gently wiping down components, tempered glass panels, and case surfaces without scratching them. It’s especially useful if you accidentally touch a CPU heat spreader or leave fingerprints on glass panels.
Isopropyl Alcohol (90% or Higher)
If you need to remove old thermal paste or clean a CPU surface, isopropyl alcohol is the safest option. Pair it with a lint-free cloth or coffee filter for best results.
This is especially helpful when upgrading or reseating a CPU cooler.
Thermal Paste (If Not Pre-Applied)
Many CPU coolers come with pre-applied thermal paste, but not all do. Having a small tube of quality thermal paste on hand ensures proper heat transfer between your CPU and cooler.
Using too much or too little paste is a common beginner mistake, so be sure to follow manufacturer recommendations.
Software Tools for Setup and Monitoring
Once your PC powers on successfully, software tools play a major role in making sure everything runs smoothly, stays cool, and performs as expected.
Operating System Installation Media
Whether you’re installing Windows or Linux, you’ll need bootable installation media. For Windows users, this usually means creating a bootable USB drive using Microsoft’s Media Creation Tool.
Make sure you download your OS from official sources to avoid malware or corrupted files.
Driver Installation Tools
After installing the OS, drivers are critical. This includes drivers for your graphics card, motherboard chipset, network adapter, and audio components.
Manufacturer websites are the safest place to download drivers, even if Windows installs some automatically.
Hardware Monitoring Software
Monitoring tools let you keep an eye on temperatures, fan speeds, and system usage. Popular options include CPU and GPU monitoring utilities that show real-time performance data.
These tools help catch overheating or performance issues early, especially after your first build.
Benchmarking and Stress Test Software
Benchmarking tools help verify that your system is performing as expected. Stress tests can also help ensure stability under heavy loads.
While not required, these tools are useful for peace of mind—especially for gaming or high-performance builds.
Conclusion
Building your own PC doesn’t require expensive equipment or advanced technical skills—it just takes the right tools and a bit of preparation. With a solid screwdriver, a few organization tools, basic cleaning supplies, and the right software, you’ll be well-equipped to handle your first build or upgrade with confidence.
The key is staying organized, working slowly, and not being afraid to double-check your work. Mistakes happen to everyone, even experienced builders, but having the right tools on hand makes those mistakes much easier to fix.
If you’ve built a PC before, what tools did you find most helpful? And if you’re planning your first build, which tool are you most excited (or nervous) about using? Leave a comment below and join the conversation—I’d love to hear from you.