
Fixing Network Connection Problems
Few things are more frustrating than losing your internet connection right when you need it most—whether you’re in the middle of a work project, streaming your favorite show, or trying to download a game. The good news is that most network connection problems aren’t as complicated as they seem. In fact, you can often fix them yourself with a few quick checks and adjustments.
In this guide, we’ll walk through simple, step-by-step ways to diagnose and repair common network issues. Whether your PC is saying “No Internet” or you’re dealing with slow Wi-Fi, these beginner-friendly tips will help you get back online fast.
1. Understanding Common Network Issues
Before diving into fixes, it helps to understand what might be causing your network
connection problems. Knowing the source can save time and prevent unnecessary troubleshooting.
Here are some of the most common culprits:
- Router or modem problems: Your router might have crashed or overheated, or your modem might have lost its connection to your internet provider.
- Weak Wi-Fi signal: If you’re far from your router or have thick walls blocking the signal, you may experience drops or slow speeds.
- ISP outages: Sometimes the problem isn’t on your end—it could be a temporary outage from your Internet Service Provider (ISP).
- Network configuration errors: Incorrect IP settings or outdated network drivers can prevent your PC from connecting properly.
- Hardware or cable issues: Loose or damaged Ethernet cables can break your connection entirely.
Tip: When your internet goes down, check whether other devices (like your phone or tablet) are also affected. If everything is offline, the issue is likely with your router or ISP, not your computer.
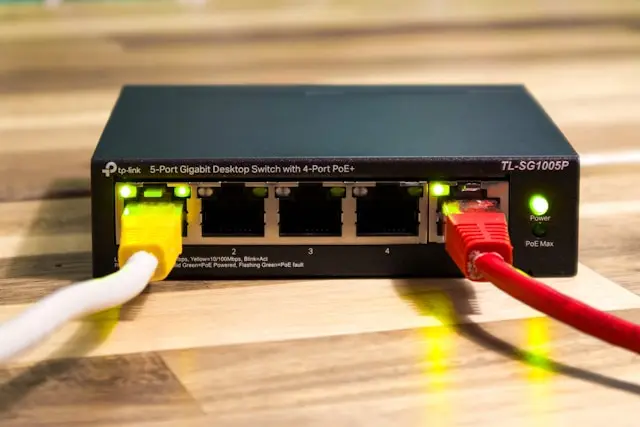
2. Checking Your Hardware and Connections
Hardware problems are one of the most common and easily fixable causes of connection trouble. Before jumping into software fixes, take a moment to inspect the physical setup.
Check your cables and router
- Make sure all cables are secure: If you’re using a wired connection, check that your Ethernet cable is firmly plugged into both the computer and the router. Try a different port or cable if necessary.
- Power cycle your router and modem: Unplug them from power for about 30 seconds, then plug them back in. Wait a couple of minutes for them to fully restart. This simple step often resolves many connection problems.
- Check router lights: Your router should have lights indicating power, internet, and LAN/Wi-Fi status. If any of these lights are off or red, there’s likely an issue with the internet line or your ISP.
Improve your Wi-Fi signal
- Move your device closer to the router.
- Avoid physical obstructions like thick walls or metal surfaces.
- Keep your router elevated and in a central location for better coverage.
- Disconnect devices you aren’t using—too many connections can slow down Wi-Fi performance.
Bonus Tip: If your Wi-Fi signal is weak even when you’re close to the router, consider upgrading to a dual-band or mesh Wi-Fi system. These provide stronger and more stable connections throughout your home.
3. Troubleshooting Software and Settings
If your hardware looks fine but your PC still won’t connect, it’s time to check your software settings. Windows includes built-in tools to help diagnose and repair common network problems.
Run the Windows Network Troubleshooter
- Right-click the Network icon in your system tray.

- Choose Troubleshoot problems.
- Follow the on-screen instructions—Windows will automatically detect and fix issues like incorrect IP configurations or DNS problems.

This tool won’t solve everything, but it’s a great first step for identifying what’s wrong.
Reset your network settings
If troubleshooting doesn’t work, resetting your network can help. This clears out corrupted configurations that might be causing trouble.
- Open Settings > Network & Internet > Status.
- Scroll down and click Network reset.
- Follow the prompts and restart your computer.
After the restart, you’ll need to reconnect to your Wi-Fi network and re-enter your password.
Check your network drivers
Outdated or corrupted drivers can also cause connectivity issues. For a full walkthrough on keeping drivers up to date, see the complete guide to installing and updating drivers.
- Press Windows + X and choose Device Manager.
- Expand Network adapters.
- Right-click your adapter and select Update driver → Search automatically for drivers. For more details, see the complete guide to installing and updating drivers.
If your PC can’t find a new driver, visit your computer or network card manufacturer’s website to download the latest version manually.
Renew your IP and flush DNS
If your system is stuck on old network data, refreshing it can help. For additional troubleshooting tips, check out these tips for troubleshooting network connectivity issues.
- Open Command Prompt as administrator.
- Type the following commands, pressing Enter after each:
- ipconfig /release
- ipconfig /renew
- ipconfig /flushdns
These commands reset your IP address and clear cached DNS data, which often resolves weird or persistent connectivity issues.
4. Advanced Fixes and Preventive Steps
If you’ve tried everything above and your connection is still unreliable, there are a few advanced fixes worth trying. Don’t worry—these are still easy enough for beginners to follow.
Update your router firmware
Routers need updates too! Outdated firmware can cause instability, slow speeds, or security vulnerabilities. Keeping your router and other hardware devices maintained is key to a stable network.
- Open your router’s admin page (usually at 192.168.1.1 or 192.168.0.1).
- Log in using the credentials printed on your router.
- Look for a Firmware Update or Maintenance section and follow the instructions.
Tip: Always back up your router’s settings before updating.
Change your DNS settings
Sometimes, your ISP’s DNS servers can be slow or unresponsive. Switching to a public DNS can improve reliability and speed. For more details, explore diagnosing and resolving hardware compatibility issues if changing DNS doesn’t solve your network trouble.
- Go to Control Panel > Network and Internet > Network Connections.
- Right-click your active connection and select Properties.
- Choose Internet Protocol Version 4 (TCP/IPv4) and click Properties.
- Select Use the following DNS server addresses and enter:
-
- Preferred DNS: 8.8.8.8
- Alternate DNS: 8.8.4.4 (Google’s DNS)
Click OK, then restart your computer.
Secure your network
Unsecured or crowded networks can lead to slow or unstable connections. For guidance on how to defend your home setup, read about how to secure your home network from hackers.
- Set a strong Wi-Fi password using WPA2 or WPA3 encryption.
- Regularly update your router password.
- Disconnect unknown devices from your network via your router’s admin page.
When to call your ISP
If you’ve checked your hardware, drivers, and settings, and still have no luck, the problem might be outside your home. Contact your ISP to see if there’s an outage or line issue in your area. They can also help test your connection remotely.
Conclusion
Network problems can feel intimidating at first, but with the right approach, most can be solved in just a few steps. Start with the basics—check your cables, restart your router, and run the built-in troubleshooting tools. If that doesn’t work, dive a little deeper by updating drivers, resetting your network, or adjusting DNS settings.
Keeping your network updated and secure also helps prevent future issues. With these tips, you’ll be ready to handle most connection problems like a pro.
Have you ever had to fix a tough network issue? Share your experience in the comments below—your story might help someone else get back online faster!