Building your own computer might seem like a daunting task, but with the right approach and tools, it can be an exciting and rewarding experience. This guide walks you through the process of installing and setting up PC components, ensuring your build is smooth and stress-free.
Preparing for Installation
Before diving into assembly, preparation is key.
- Gather Your Tools:
- Screwdrivers (typically Phillips #2).

- Anti-static wrist strap to prevent electrostatic discharge (ESD).
- Cable ties for clean cable management.
- Screwdrivers (typically Phillips #2).
- Create a Clean Workspace:
Use a non-static surface with plenty of room to lay out your components. Avoid working on carpets, which can generate static electricity. - Unpack and Inspect Components:
Check that all parts are present and undamaged. Your primary components include:- CPU (processor)
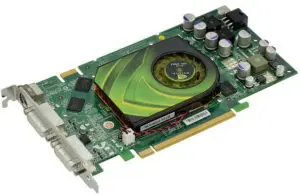
- GPU (graphics card)
- Motherboard
- RAM (memory)
- Storage (SSD/HDD)
- PSU (power supply unit)
- Case
- Read the Manuals:
Manufacturer manuals are your best friend, providing specific instructions for installation and compatibility.
Step-by-Step Installation of PC Components
Follow these steps to assemble your PC:
- Install the CPU and Cooler:
- Open the CPU socket lever on the motherboard.
- Align the CPU with the socket (check the orientation mark) and gently place it in.
- Secure the cooler on top, ensuring contact with thermal paste. If the cooler doesn’t come with pre-applied paste, add a pea-sized amount to the CPU before installing.
- Insert RAM Modules:
- Locate the RAM slots and check your motherboard manual for proper configuration (e.g., dual-channel setup).
- Press each module firmly until you hear a click.
- Install Storage Devices:
- For M.2 SSDs, insert them at a slight angle into the dedicated slot and screw them in place.
- For SATA SSDs or HDDs, mount them in the case and connect the SATA and power cables.
- Mount the Motherboard:
- Align the motherboard with the standoffs in the case and screw it down securely.
- Attach the front-panel connectors and case cables as per the manual.
- Install the GPU:
- Insert the GPU into the PCIe slot on the motherboard until it clicks.

- Secure it with screws and connect the required power cables from the PSU.
- Insert the GPU into the PCIe slot on the motherboard until it clicks.
- Connect the PSU:
- Mount the PSU into the case and connect the 24-pin motherboard, CPU power, and GPU power cables.
- Manage Cables:
- Use cable ties to route and tidy up cables for better airflow and aesthetics.
Setting Up the BIOS and Initial Configuration
Once your hardware is assembled, it’s time to configure the system:
- Power On the System:
- Connect the PC to a monitor, keyboard, and mouse.
- Turn on the PSU and press the power button. The system should boot into the BIOS.
- Update the BIOS:
- Check the manufacturer’s website for the latest BIOS version.
- Follow the instructions to update it using a USB drive.
- Set Boot Priority:
- Configure the BIOS to boot from the storage device where you plan to install the operating system.
- Enable XMP (Extreme Memory Profile):
- For RAM, enable XMP in the BIOS to ensure optimal performance.
Installing the Operating System and Drivers
Your hardware is ready, and now it’s time to set up the software:
- Install the Operating System:
- Use a bootable USB drive with your desired OS (e.g., Windows or Linux).
- Follow the on-screen instructions to partition the drive and install the OS.
- Install Drivers:
- Start with the motherboard drivers for network and audio functionality.
- Update the GPU drivers using software like NVIDIA GeForce Experience or AMD Adrenalin.
- Install additional drivers for peripherals like keyboards or monitors.
- Run Updates:
- Check for operating system updates to ensure your system has the latest security patches.
Common Issues and Tips
- No Power? Check PSU connections and power button cables.
- No Display? Reseat the GPU and ensure the monitor is connected to the GPU, not the motherboard.
- Overheating? Verify cooler installation and ensure case fans are working.
By following this guide, you’ll have a custom-built PC ready for gaming, work, or any other computing needs. Enjoy the satisfaction of knowing your system inside and out!


